In September, we went camping and I got some really great pics. One of them, I printed twice by accident, and ended up scrapping... twice... without even realizing it. I used BoBunny "Calendar Girl" collection for both layouts, plus extras like BoBunny foil rub ons, double dot cardstock, embellishments, etc.
I guess when you really like a picture, scrapping it twice isn't the worst thing that could happen :)
And here's the latest layout I made, again using "Calendar Girl" with double dot cardstock as background:
Monday, December 28, 2015
Sunday, December 27, 2015
Gorgeous, glittery "Whiteout"
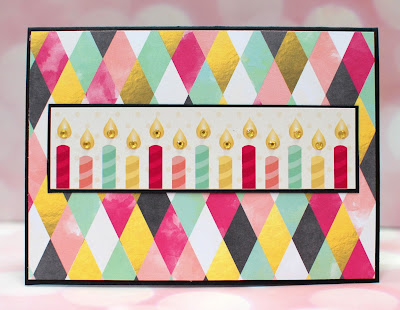
I recently made good use of the "Whiteout collection" by BoBunny. The paper is already glittered, so it makes holiday cards really quick and easy to do. First, my daughter had a birthday party to go to, and the party was at a skating rink. This paper had the perfect images to make a cute giftbag and card set:
This collection also came in handy when I had to make 10 holiday cards (8 for my daughter's teachers, and two for each other kids' bus drivers). Because the paper was already glittered and pretty enough to use as is, it really didn't take long. I simply made up the cards and then added jewels in the middle of the snowflakes for a little extra embellishment.
Sunday, November 29, 2015
Quick and simple BoBunny birthday cards!
I hope everyone (who celebrates it) had a nice Thanksgiving! Today I'm sharing three new cards I made using the "You're Invited" collection from BoBunny. This collection is party and birthday themed, so making some birthday cards was a snap. I also used some Bobunny flowers, jewels, and and from the collection stickers, chipboard). I love how everything coordinates so well. And as always, I added pretty paper inside the cards to finish them off. Just make sure you use a muted, lighter pattern so your message is easy to read.
Saturday, October 17, 2015
Fall birthday cards galore!
BoBunny has a wonderful Fall collection, called "Enchanted Harvest". It is absolutely gorgeous with rich, warm colors, and... butterflies! Yes, autumn butterflies, and some fairies. How awesome is that. I wanted to make a few cards with it, so here they are:
Here is the first card, close up and a peek inside:
And here is the second card, again with a peek inside. I again added BoBunny gold glitter paste to the butterflies I cut out of one of the sheets:
And I was really on a roll with this collection, so I made two more cards - these ones are super simple. I just cut the postcard images from one of the sheets of paper and added the birthday sentiment. My daughter went to a birthday party on Thursday and has another one she's going to today, so these are already gone :)
Monday, September 21, 2015
New art journal!
I recently purchased a new art journal - it's the Strathmore 500 Series Mixed Media soft cover journal, 5x8 or so. The paper is really nice and perfect for all sorts of media. Here's the first page completed... a welcome to the journal page :)
Monday, September 7, 2015
Watch me sketch!
Happy Labor Day!
I have a little journal I've been carrying around, but I've been using it as a sketchbook more than anything. I recently made a quick sketch (took a little over 20 minutes) and recorded the process. I sped it up 4 times, so now it's a 5 minute video. Take a look:
Here is the completed sketch (I messed with it a couple more minutes):
And while I was taking a pic, I figured I'd share a few more:
Sunday, September 6, 2015
Art Journal Week: Day 8
Last day of my art journal week! I can't believe I made 16 layouts in one month. Toward the end, I got motivated to finish it so I could move on to my new art journal that has really nice paper that can withstand various paints and mediums (unlike the paper in this one). It was a great starting place, and a really great way to use up some of my stash, so overall it was a really positive, fun experiment.
As I mentioned yesterday, for the last two spreads, I used Graphic 45 papers. This one with with "Halloween in Wonderland". I painted the pages black, and then used a Crafter's Workshop Harlequin stencil and sprayed it with white Dylusions spray. I then dabbed acrylic color on top to have it match the paper better and give it more dimension.
And here is my very last layout. The quote reflects the sentiment that ending this journal is just the beginning. I really love how this last page came out - I love the (G45) poppy flowers, the spooky tree (Crafter's Workshop stencil), the night sky, and the beautiful stars. To create the stars, I used a Prima stencil with crackle paste.
Thanks for joining me and taking a peek inside my art journal. If you're considering making one, I recommend you dive right in and give it a go.
Saturday, September 5, 2015
Art Journal Week: Day 7
Welcome to day 7! Almost done! This first layout I'm sharing was created with the help of a really fun tutorial by Angela Anderson. She teaches art classes for kids and adults, so I thought this would be a fun one to try with my daughter. We bought some sea sponges and dove right in. The end result reminded me of a poem I really like, so I added it in.
This next layout came together when I dug out my stash of Graphic 45 paper. In fact, once I dug it out, I couldn't stop and all the rest of the journal was made using various collection from G45. What can I say, they have fun paper :)
I used BoBunny glitter paste to create the yellow (golden?) brick road, and the stars, and a BoBunny stamp for Glinda's magic "bubble". It's a messy bubble but that's what she gets for being in an art journal.
Thanks for stopping by, as always! And be sure to check out my post for tomorrow - last day of art journal week!
Friday, September 4, 2015
Art Journal Week: Day 6
Today I'm sharing the next two layouts in my August Art Journal. Be sure to scroll down for all the previous posts to see more. This first two-page spread was created using BoBunny's "Rose Cafe" collection and BoBunny washi tapes. I also used the music note stamp by BoBunny (it was part of a stamp set that came with an older Autumn collection they had).
I really love the effect you get by starting with a background of torn up papers and washi tapes. Most of it gets covered over, but there and there it still peeks through in interesting ways:
This next spread is created with the "Penny Emporium" collection by BoBunny. I again started with some torn papers, and lots of images cut out from the papers and from the Noteworthy pack. The tightrope was created with Pearlescents to give it more dimension, and the sparkly circles with BoBunny glitter paste and stencil. The black dots are a BoBunny stamp. This one is called "The Balancing Act":
Subscribe to:
Comments (Atom)


