Saturday, November 19, 2011

A bight and happy birthday mini :)

I still needed to scrap my daughter's 7th birthday and I had the perfect combination of supplies at hand - a beehive chipboard mini album from Maya Road and the super adorable, happy, and bright "Berrylicious" line from Imaginisce. I also used some Prima flowers, as well as ton of embellies from Imaginisce that all went with this line - chipboard stickers, canvas stickers, dimensional stickers, and die-cuts. I added glossy accents to some of the die cuts here and there for extra "oomph", as well as glimmer misted the pages for a more fun and artsy feel. I hope you guys like it! :) It's appropriately titled "Sweet 7", and it has the whole "sweetness" theme throughout. I also loved the chipboard quote - "When life gives you lemons, make lemonade". Some of you might remember that this was the disaster of a lifetime birthday that we managed to turn around so DD had a good time after all. For those of you that like video's, I did make one about this mini where I go over the pages and share some more details about it - you can find it HERE.


Saturday, November 12, 2011

Sharing some more My Little Shoebox goodness :)

Just a quick layout and a couple cards I wanted to share, using the My Little Shoebox "Destination" line. Have I mentioned before how adorable I think this line is? So boyish - perfect for boy projects, as well as all travel-related projects.

This LO is another one about DD's first day of 2nd grade. Her before-school care is at the daycare my son goes to (and where she went when she was little), so they both got dropped off there that morning. And when my son saw the little bus, he said "I want bus!" He always wants to keep up with his big sister, so he definitely wanted to go on the bus too.


And a couple quick cards. The first is an example of how the Destination line can be more pretty and feminine. To create the background, I lined it with pp and then added the left-over negative from the MLS letter stickers. Super quick and a great way to upcycle. To make the heart, I used my Sizzix and Tim Holtz mini hearts movers and shapers die. I cut it out of chipboard and then covered it with pp. And the beautiful red rose is from IAmRoses.com


And the 2nd card is a really quick and easy boy birthday card - I told you this pp is perfect for little boys!

Thursday, November 10, 2011

Stamp Carving Tutorial

Hi guys, today I wanted to share a really quick and easy tutorial on how you can make your own stamps. I wanted to make a picture tutorial since I know some people don't like to watch YouTube videos. However, for those that do, you can see my YouTube video HERE, where I carve a stamp (shown in the last image).

1.
Supplies:
- A sheet of MLS 3-D Roll Up Flowers from any collection
- Speedball Carving Block
- Speedball Carving Tool
- Pencil
- Large scissors
- Scrap paper
- Ink Pad


2.
- Punch out one of the clouds from the die-cut sheet
- Use a pencil to trace onto the carving block
- Using your large scissors, cut out the cloud with a little space around it


3.
- Using the finest tip of your carving tool, carve around the cloud outline


4.
- Now you can switch to a broad tip and carve away around the cloud
- If you like, you can use your scissors now to trim your stamp down


5.
- Ink your stamp and stamp onto the scrap paper


6.
- Use the stamped image and inked stamp to determine where else you need to keep carving
- Once satisfied, stamp again to see whether any more needs to be removed


7.
- You can continue to repeat the process of carving and stamping until you're entirely happy with the completed results. Here, it took me 3 tries.
- Consider the fact that you might not want to perfect it too much - one of the charms of making your own stamps is allowing it to be imperfect so it can retain that "handmade" look.


8.
- Here is an example of the 3 cloud stamps I made using the die-cut clouds as my templates. These are the finished results. They are the perfect size and they're quick and fun to make. Of course, you can draw your own stamps and do not need to use a template, but having a template does make it much easier.
- My next stamp-carving adventure will likely include the super-cute punch-out banners on the die-cut sheets. It would be fun to have a banner stamp!

Tuesday, November 8, 2011

Punky Bridesmaid

Today I have a mini album to share - this is the Punky Sprouts "Sprocket Sprout" mini. To make it more feminine, I cut off the ends of the cogs to make them half-circles. Pink Paislee was amazingly generous in sponsoring our DT, and I got pretty much everything that goes with the "Vintage Vogue" line...gorgeous!! The purples in the line made me think of the time I was a bridesmaid for one of my best friends - purple is our favorite color, and she had a purple wedding, and I got to wear a purple gown...yay :) If you guys want to see a YouTube video where I go over it in more detail, check it out HERE.


Thursday, November 3, 2011

Harmonie Novemeber Challenge!

The November challenge for Harmonie is up on their BLOG so check it out for all the details. The challenge this month was to use circles on your LO...pretty simple, right?? Make sure you enter to be in the running to win a prize! Here's my take on it using one of my favorite winter paper lines ever - their "La Banquise" - scrapping a pic of me as a little kid :) Yes, I grew up in Russia, and yes, it WAS cold! LOL

Monday, October 31, 2011

So beautiful....

A layout using the absolutely beautiful new line from Harmonie, "La Banquise". It's titled "So Beautiful" - I scrapped a pic of my parents as a young couple. The branch is a wood branch also made by Harmonie. To get that effect, I covered it with white Tim Holtz crackle paint and then misted it with grey-colored Tattered Angels mist and wiped the excess off with a paper towel.


Wednesday, October 26, 2011

Scrapmatts October Projects!

I have a few projects to share today using the gorgeous Scrapmatts laser cut chipboard.

First up is home decor, since we all know the Holidays are almost here. I used the new "Printer's Tray" that Scrapmatts just came up with. I used the holiday-ornament shaped base and layered the printer's tray with scalloped edge on top. The pp is Webster's Pages and I heat embossed the edges in gold. I also heat embossed the deer and the berries. The "Joy" word was already gold, so I went over with with glossy accents.

Supplies: CB1101 Words 21 Joy, CB1104 Holly 01, CB1096 Reindeers 05, and the Printer's Tray Holiday Ornament used as the base.


For the layout, I used some of the new nautical elements and again, Webster's Pages paper.
Supplies: CB6064 Nautical Designs 01.


And last but (hopefully!) not least, a card using Graphic 45 "Le Cirque" for my husband for his birthday that just happens to be October 27th :) For the "stand", I used the bottom of the lamp post - if you look above at my mini, you will see that I only used the top of the lamp post on the last page...well, I just had to make the most of the bottom part too!

Supplies: CB5024 Lamp Posts 02, CB1119 Heart Frames 08, CB1015 Butterflies 15.


Tuesday, October 25, 2011

Paper Lovelies Novemeber kit reveal!

Hi guys, I have two layouts I created using the Paper Lovelies November kit - it's full of Webster's Pages "Western Romance" and Studio Calico "Classic Calico". To see the kit "in person", check out my YouTube video.

First up is "in Bloom"


I also created "The Sweetest Delivery"


Thursday, October 20, 2011

Welcome to My Little Shoebox and Unity Hip Hop!!


Welcome welcome welcome to my stop on the hop! Don't forget, a random commenter will win a prize! You have until the end of the day on Sunday the 23rd to leave a comment, and the winner will be announced on the MLS blog on Monday!

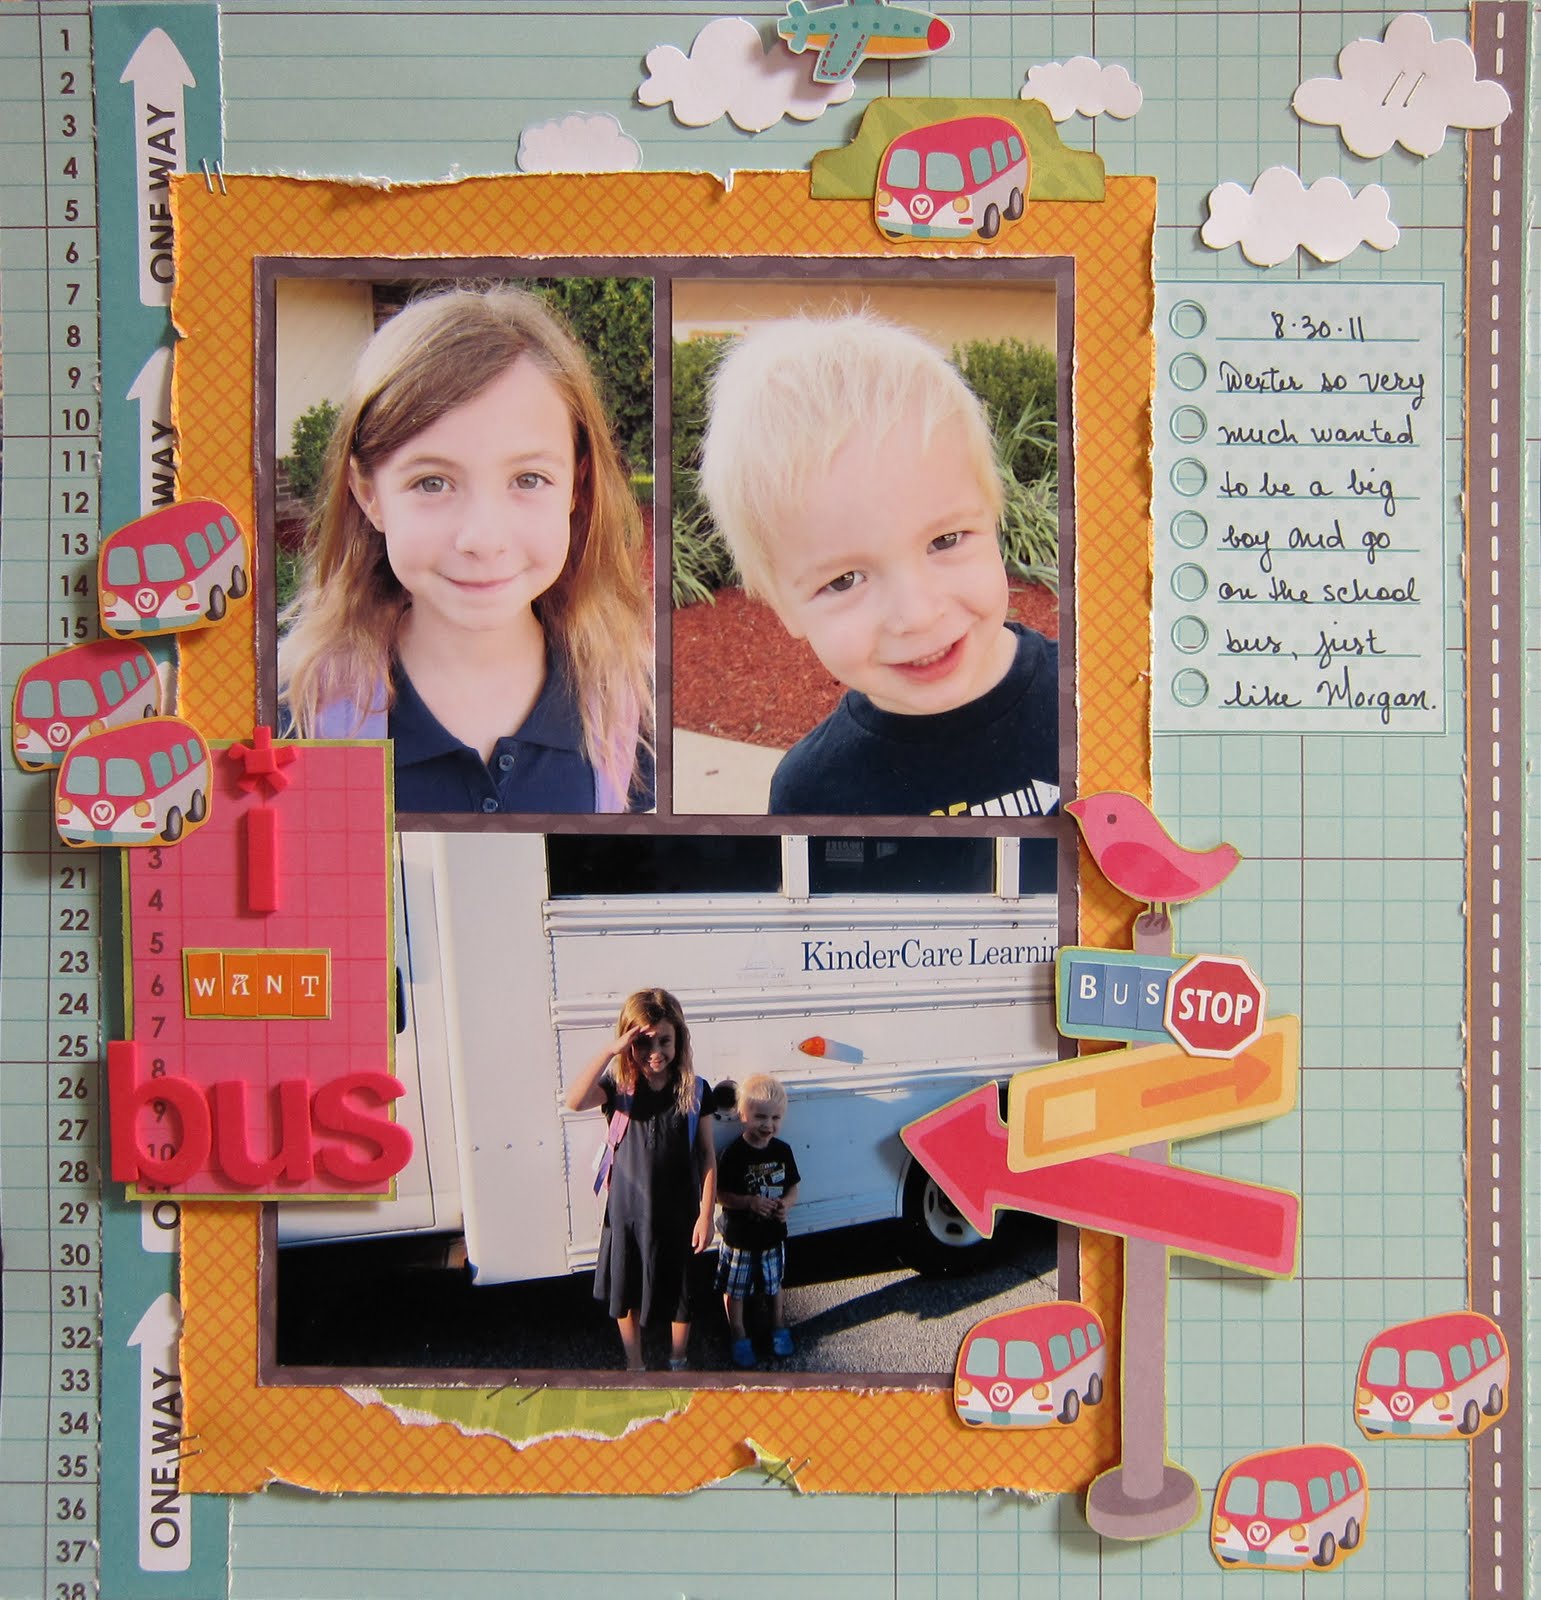
Today we're all sharing a project we created using MLS and Unity, and I made a Layout using the adorable new line from MLS called "Destination", as well as the Unity stamp set that coordinates with that line.


I used the stamps to make the cute airplane on the top right by stamping it one the ledger pp from the Destination line. I also made the journaling card using a stamp from the stamp set. I so love Unity stamps - my absolute favorite brand because of the amazing quality and style. The cute canvas banners are by Punky Sprouts, and the letters and stickers are all MLS, of course :)

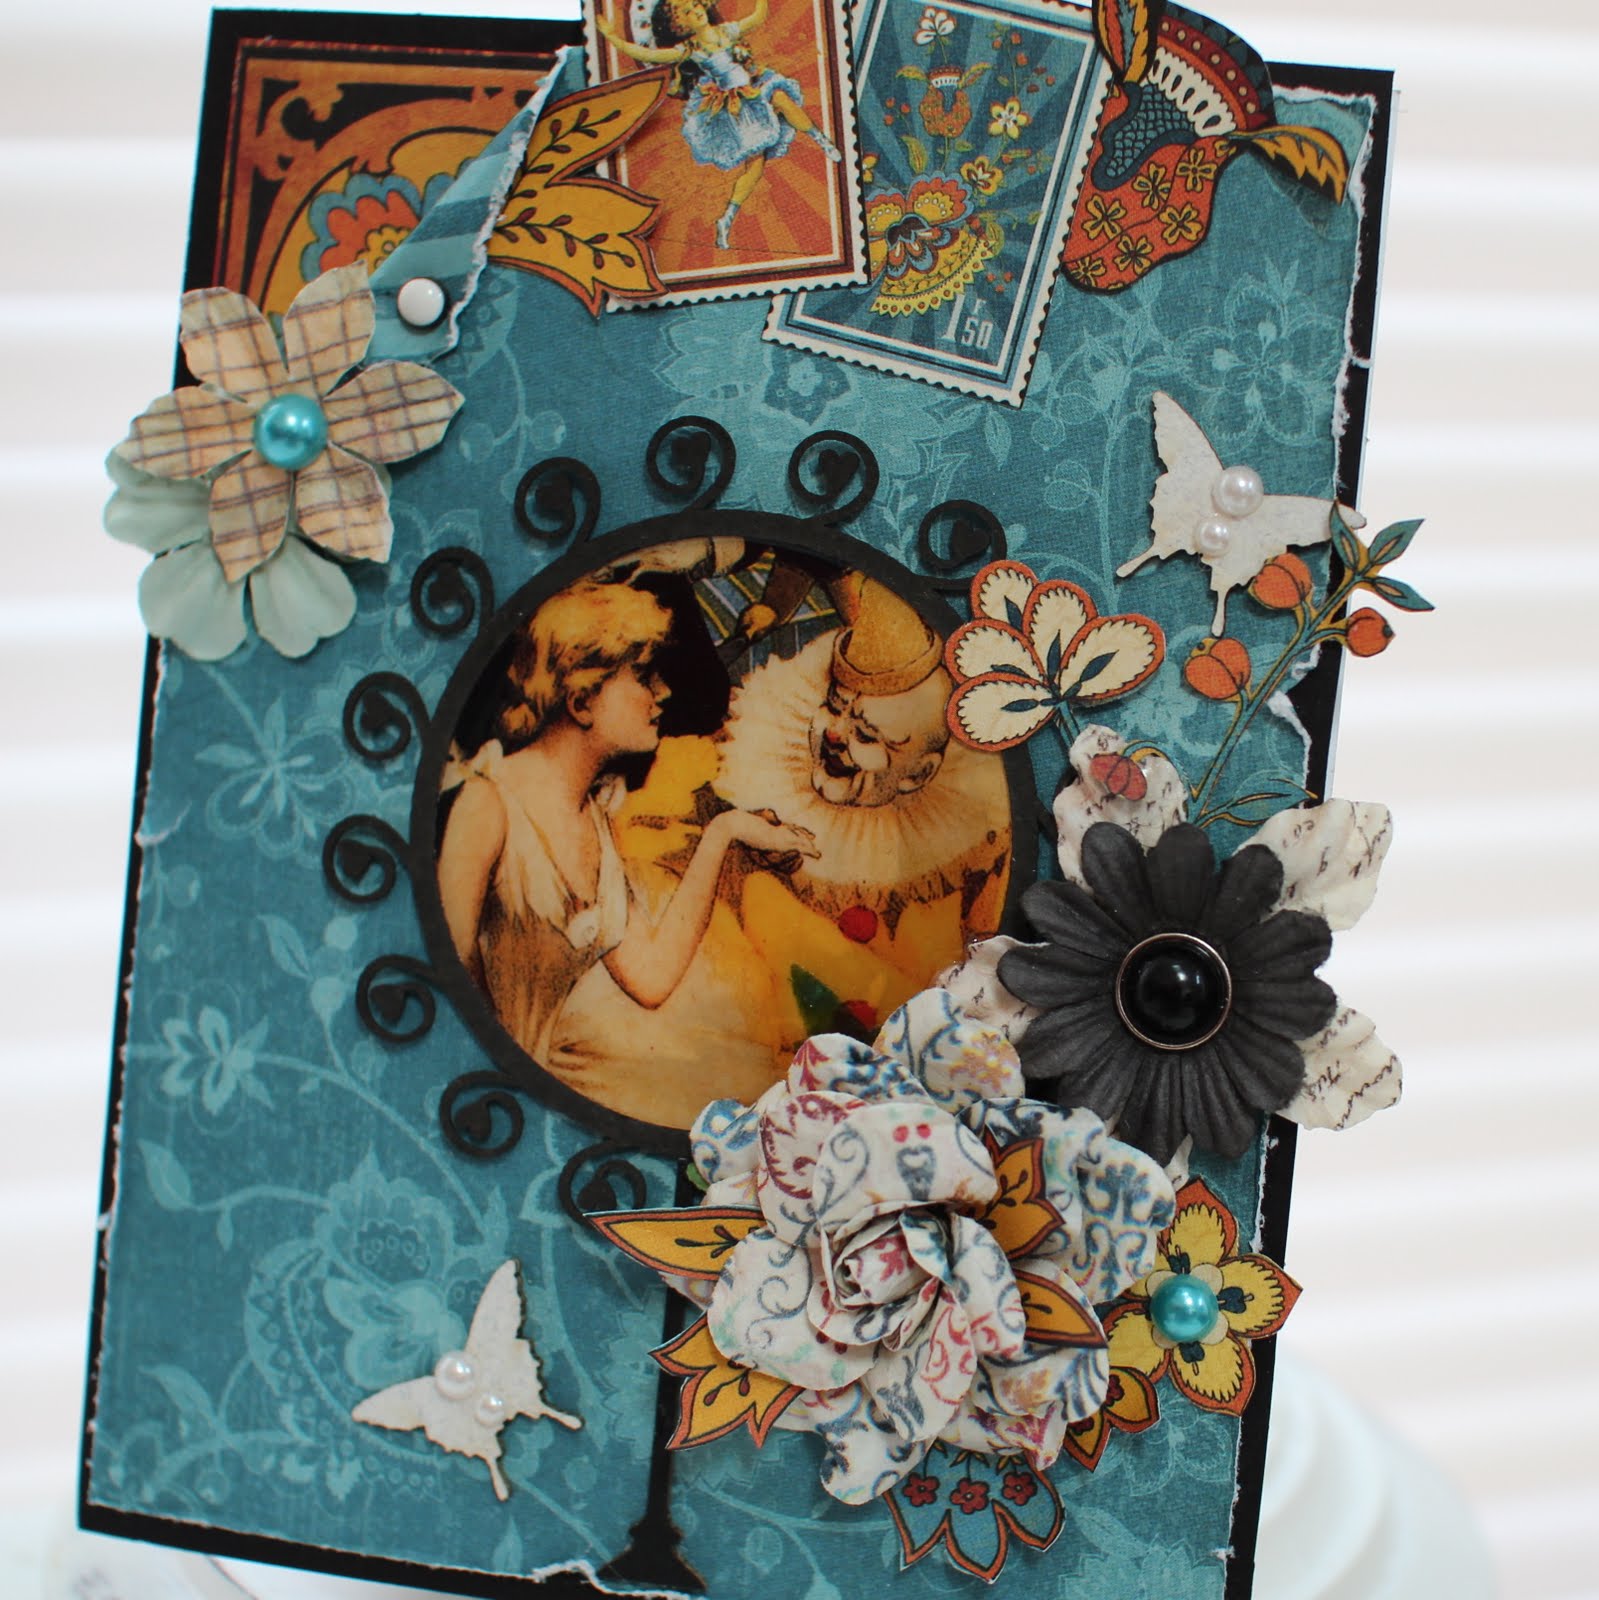
I also wanted to share a quick little card where I used the Destination line and the coordinating stamp set. I used the little ticket stamp.


Well, I hope you liked my projects...make sure you leave a comment and hop on over to the next stop, Lisa Henke from the Unity team.

And here is the entire blog hop order, if you get lost along the way:
Unity Blog - http://theunitystampco.blogspot.com/
Brooke Lien - http://brookelien.blogspot.com/
Beckie Dreyer - http://beckiedreyer.blogspot.com/
Eva Dobilas – http://evafromca.blogspot.com/
Becky Williams - http://onescrappinmama.blogspot.com/
Jen Erichson – http://shut-up-its-true.blogspot.com/
Erin Yamabe - http://erinyamabe.com/
Karen Maldonado – http://reallifeinpictures.blogspot.com/
Ilene Tell - http://whatabunchofscrap.blogspot.com/ <------------YOU ARE HERE :)
Lisa Henke – http://www.mylittlecreativeescape.blogspot.com/
Keely Yowler - http://www.keelyy.blogspot.com/
Maria Gurnsey – http://scrapsbym.blogspot.com
Kristine Berc - http://stashofprettypaper.blogspot.com/
Robyn Weatherspoon – http://herebygrace.typepad.com/here_by_grace/
Linda Kretz - http://cloud9ideas.blogspot.com/
Wendy Chang– http://www.justwen.blogspot.com/
Mandy Starner - http://www.heyheymandykay.com/
Jolande van Oosterhout- http://www.justjolande.blogspot.com/
Melinda Spinks - http://www.thescrapfarm.blogspot.com/
Jessica Diedrich – http://thewhimsicalbutterfly.blogspot.com/
My Little Shoebox Blog - http://www.mylittleshoebox.typepad.com/

And don't forget to check out the Unity blog again next Thursday, because we will be having the second part of the MLS/Unity Hip Hop then, so even more chances to win and more opportunities to see some inspiring projects!